



Effects
Effects change how an object looks without changing its geometry: a soft shadow, a blur, a glow, paper grain, a hand-drawn edge, other colors, or transparency. Each is a node in the Effects category (Shift + A, then Effects): put it between an object and the Output.
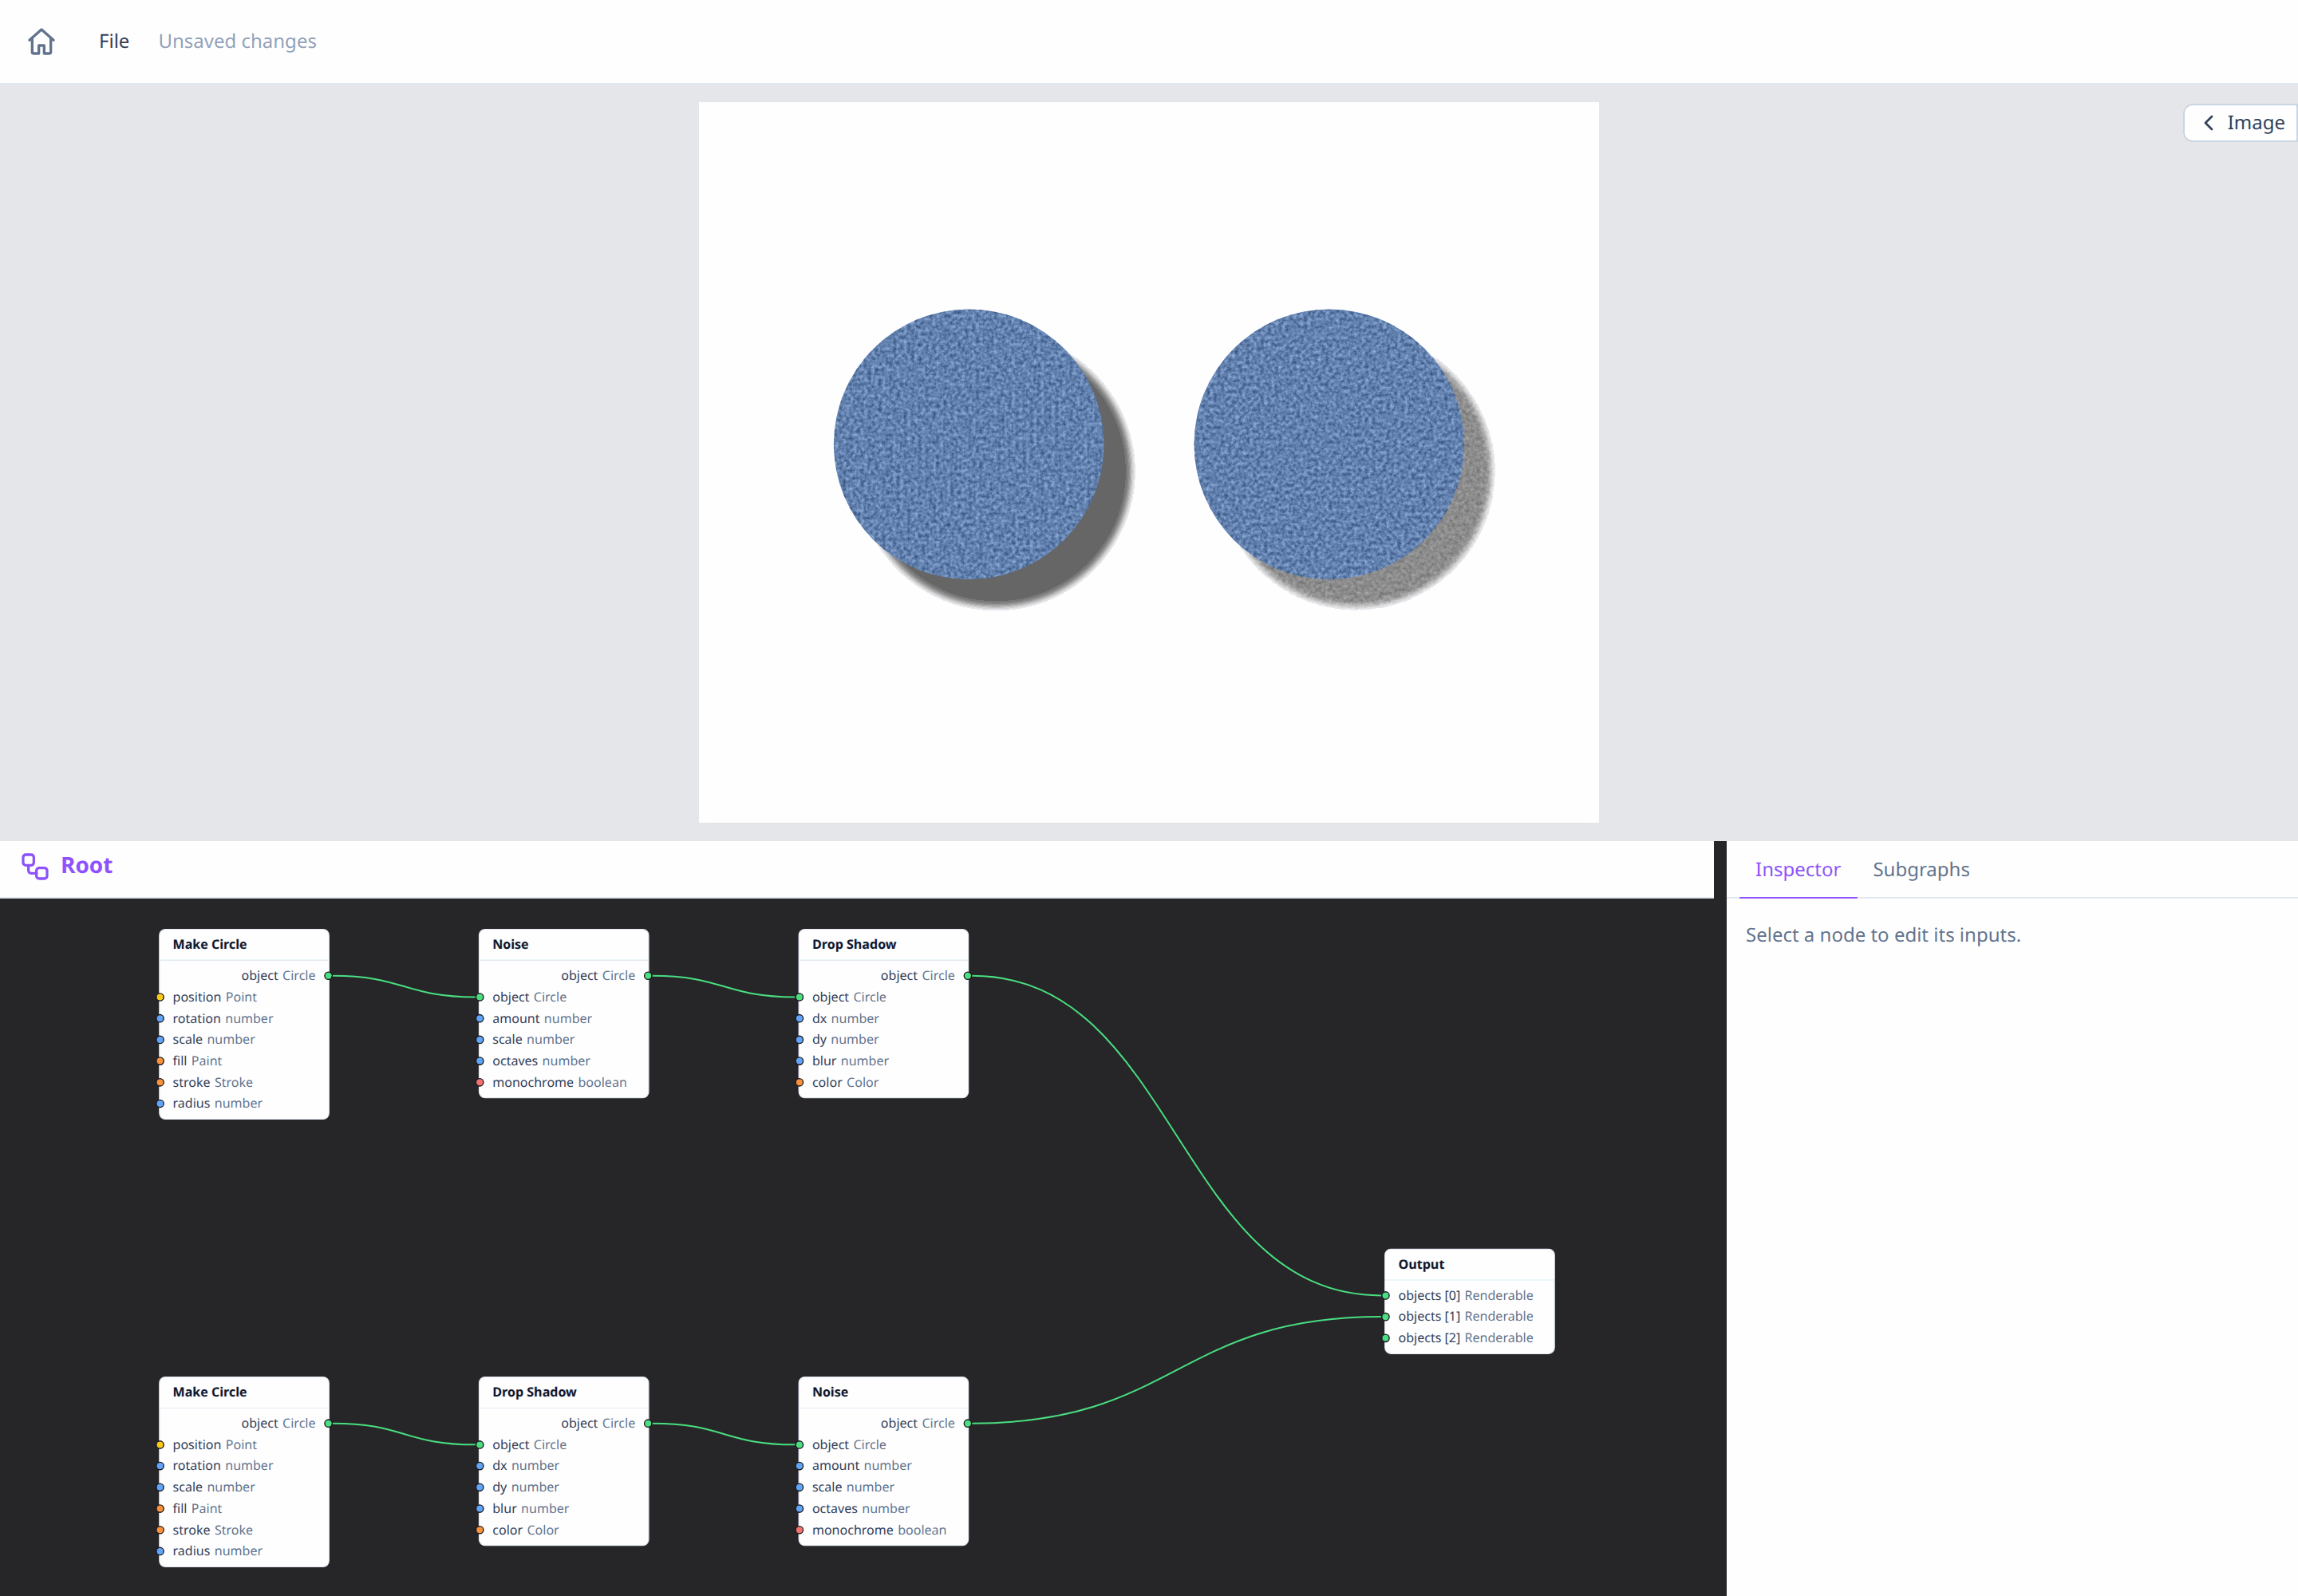
Adding an effect
Connect any shape, line, text, group or SVG image to an effect node's
object input, and the effect node to the Output (or to the next effect
node). Its output is a copy of the object with the effect added: same
type, same position and size, so it still connects wherever the object
did. The original stays as it was, so you can draw it too.
The effects
| Node | What it does |
|---|---|
| Drop Shadow | A blurred, colored copy of the object, offset under it. |
| Blur | Blurs the object. |
| Glow | A blurred, colored halo around the object. |
| Adjust Colors | Brightness, contrast, saturation, hue, grayscale, sepia, invert. |
| Noise | Grain inside the object's shape, gray or colored. |
| Displace | Pushes the object's pixels around by noise: wobbly, hand-drawn edges. |
| Opacity | Makes the object see-through. |
| Blend Mode | How the object mixes with what's drawn under it. |
Noise and Displace draw their pattern from the node's own sequence of random numbers, like the random nodes: the same every time, different for each node. For another pattern, change the node's seed (the dice in the inspector).
Chaining effects
Effect nodes can follow each other, and each applies to the result of the ones before it. So the order matters, as in the picture above:
- Noise → Drop Shadow adds grain to the circle, then casts a smooth shadow under the grainy circle.
- Drop Shadow → Noise casts the shadow first, so the grain covers the circle and its shadow together.
A good order for most drawings is: shape changes first (Displace), then the object's surface (Noise, Adjust Colors), then what's around it (Drop Shadow, Glow). The paper cut-out example uses Displace → Noise → Drop Shadow.
Effects on groups
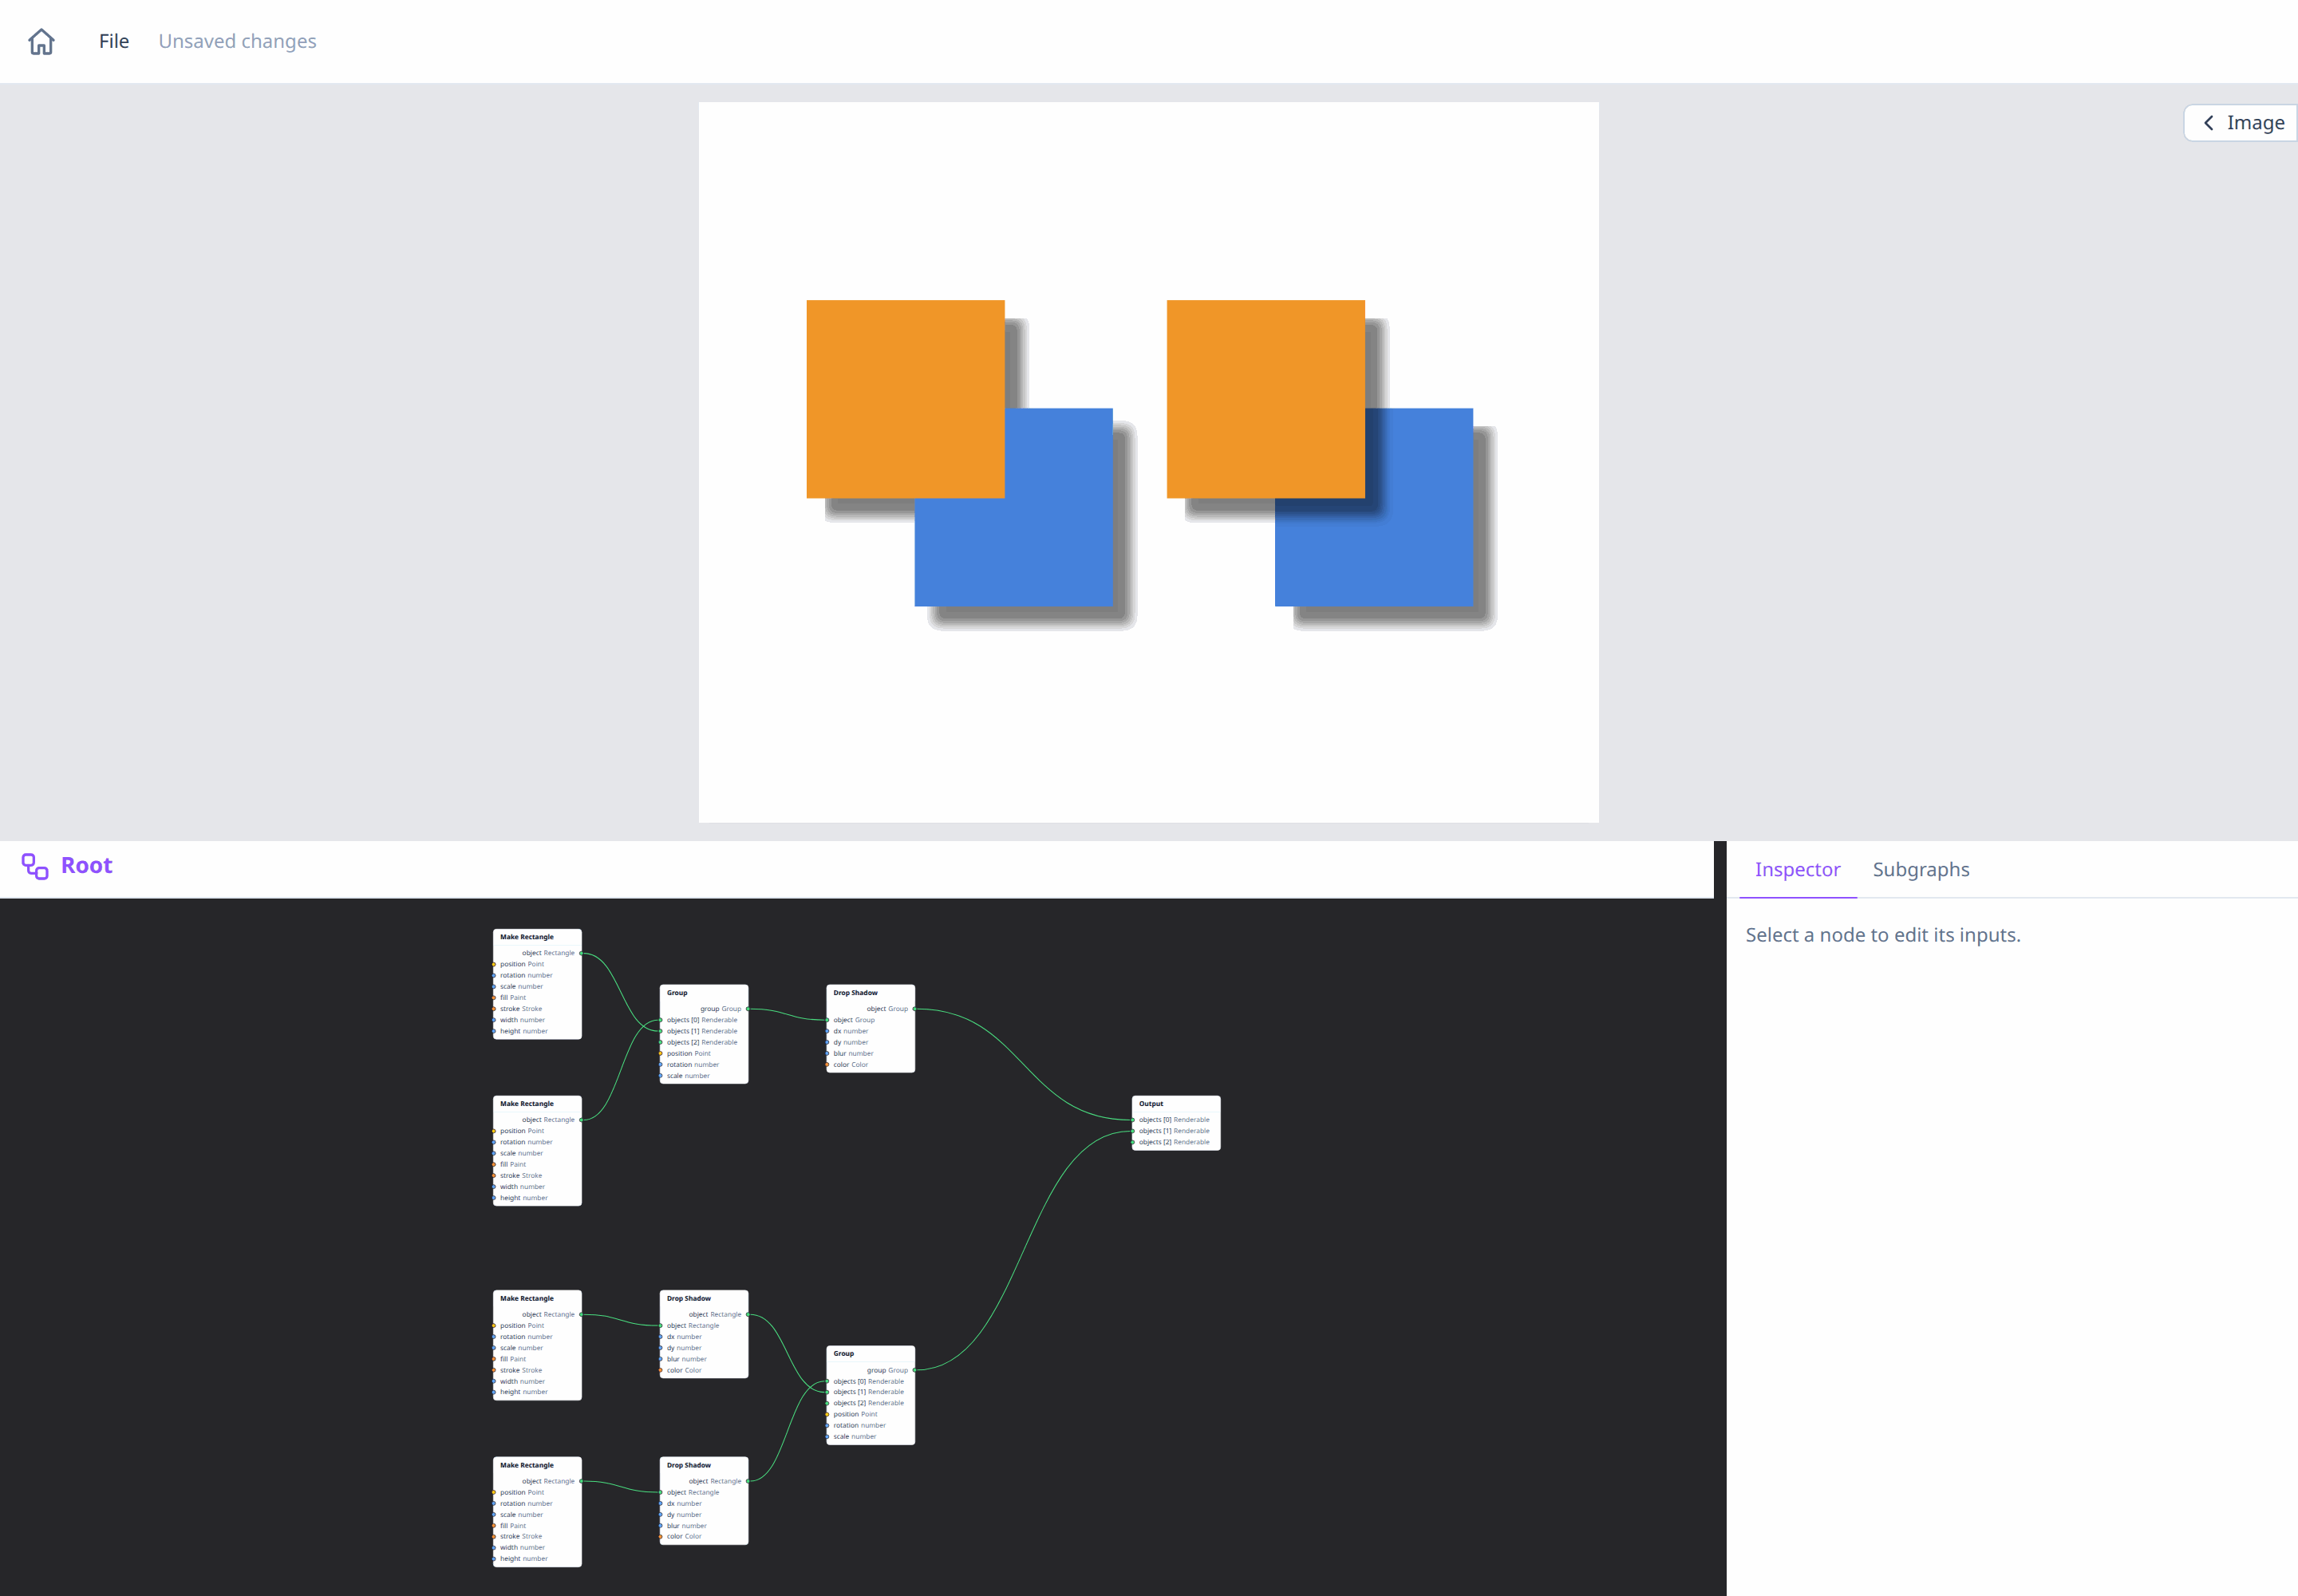
An effect on a Group applies to the group as one image, after its children are drawn: a Drop Shadow on a group casts one shadow around all of them, and the children don't shadow each other. For a shadow per child, put a Drop Shadow on each child before the group. Children keep their own effects inside the group.
Opacity and fill opacity
There are two ways to make something see-through:
- A color's
a(alpha), in afillor a stroke'scolor, makes only that fill or stroke see-through. An outlined shape with a see-through fill shows its own outline through the fill. - The Opacity node makes the whole object see-through as drawn: fill, outline and effects together, like one sheet of tinted glass. On a group, overlapping children don't show through each other. Opacity nodes multiply: two of 0.5 give 0.25.
Blend modes
A Blend Mode node sets how the object
combines with everything drawn under it: earlier Output slots, and earlier
children of the same group. multiply darkens like layered ink, screen
lightens like overlapping lights, difference subtracts colors; see
BlendMode for all of them. On the empty white
page, most modes look like normal.
Sizes and bounding boxes
- Effects scale with the object. A shadow's offset, a blur's radius
and a Noise or Displace
scaleare in the object's own units: scale the object up and its effects grow with it, rotate it and the shadow turns too. - Bounding boxes ignore effects. AABB, OOBB and the other nodes that measure an object see its geometry only: a shadow, a glow or a wobble isn't part of its box.
Effects in the downloaded SVG
The preview and Download SVG (see
Live preview) draw
effects as standard SVG filters, opacity and blend modes, so the file
shows them in browsers and in vector editors such as Inkscape. Break reads
an object's opacity and blendMode.
See also
- Paper cut-out: a worked example with Displace, Noise, Drop Shadow and a group.
- Renderable: the opacity, blend mode and effects every object has.
- Freezing nodes: keep a result exactly as it is, whatever changes upstream.