



A glowing ball in a gradient frame
A ball lit from the top left, inside a square frame that fades from yellow to orange. Both gradients use the same two colors, made once and shared. Along the way you'll see how gradients are built from color stops, and why their points are in the shape's own units.
 Open in Playground
You'll use: Make ColorStop, Make Array, Make RadialGradient, Make LinearGradient, Make Stroke, Make Circle, Make Rectangle, Output.
Steps
1. Make the color stops
A gradient blends between color stops: a color at an offset from 0 (where the gradient starts) to 1 (where it ends).
Add a Make ColorStop node (Shift + A, then Objects → ColorStop →
Make ColorStop, or type "make colorstop"). Leave its offset at 0 and set
its color to r 254, g 240, b 138 (pale yellow).
Add a second Make ColorStop with offset 1 and color r 234, g 88, b 12
(orange).
Gradients take their stops as a list. Add a Make Array node (Array →
Make Array) and connect each stop's object output to one of its items
slots. The first wire makes it an array of ColorStops.
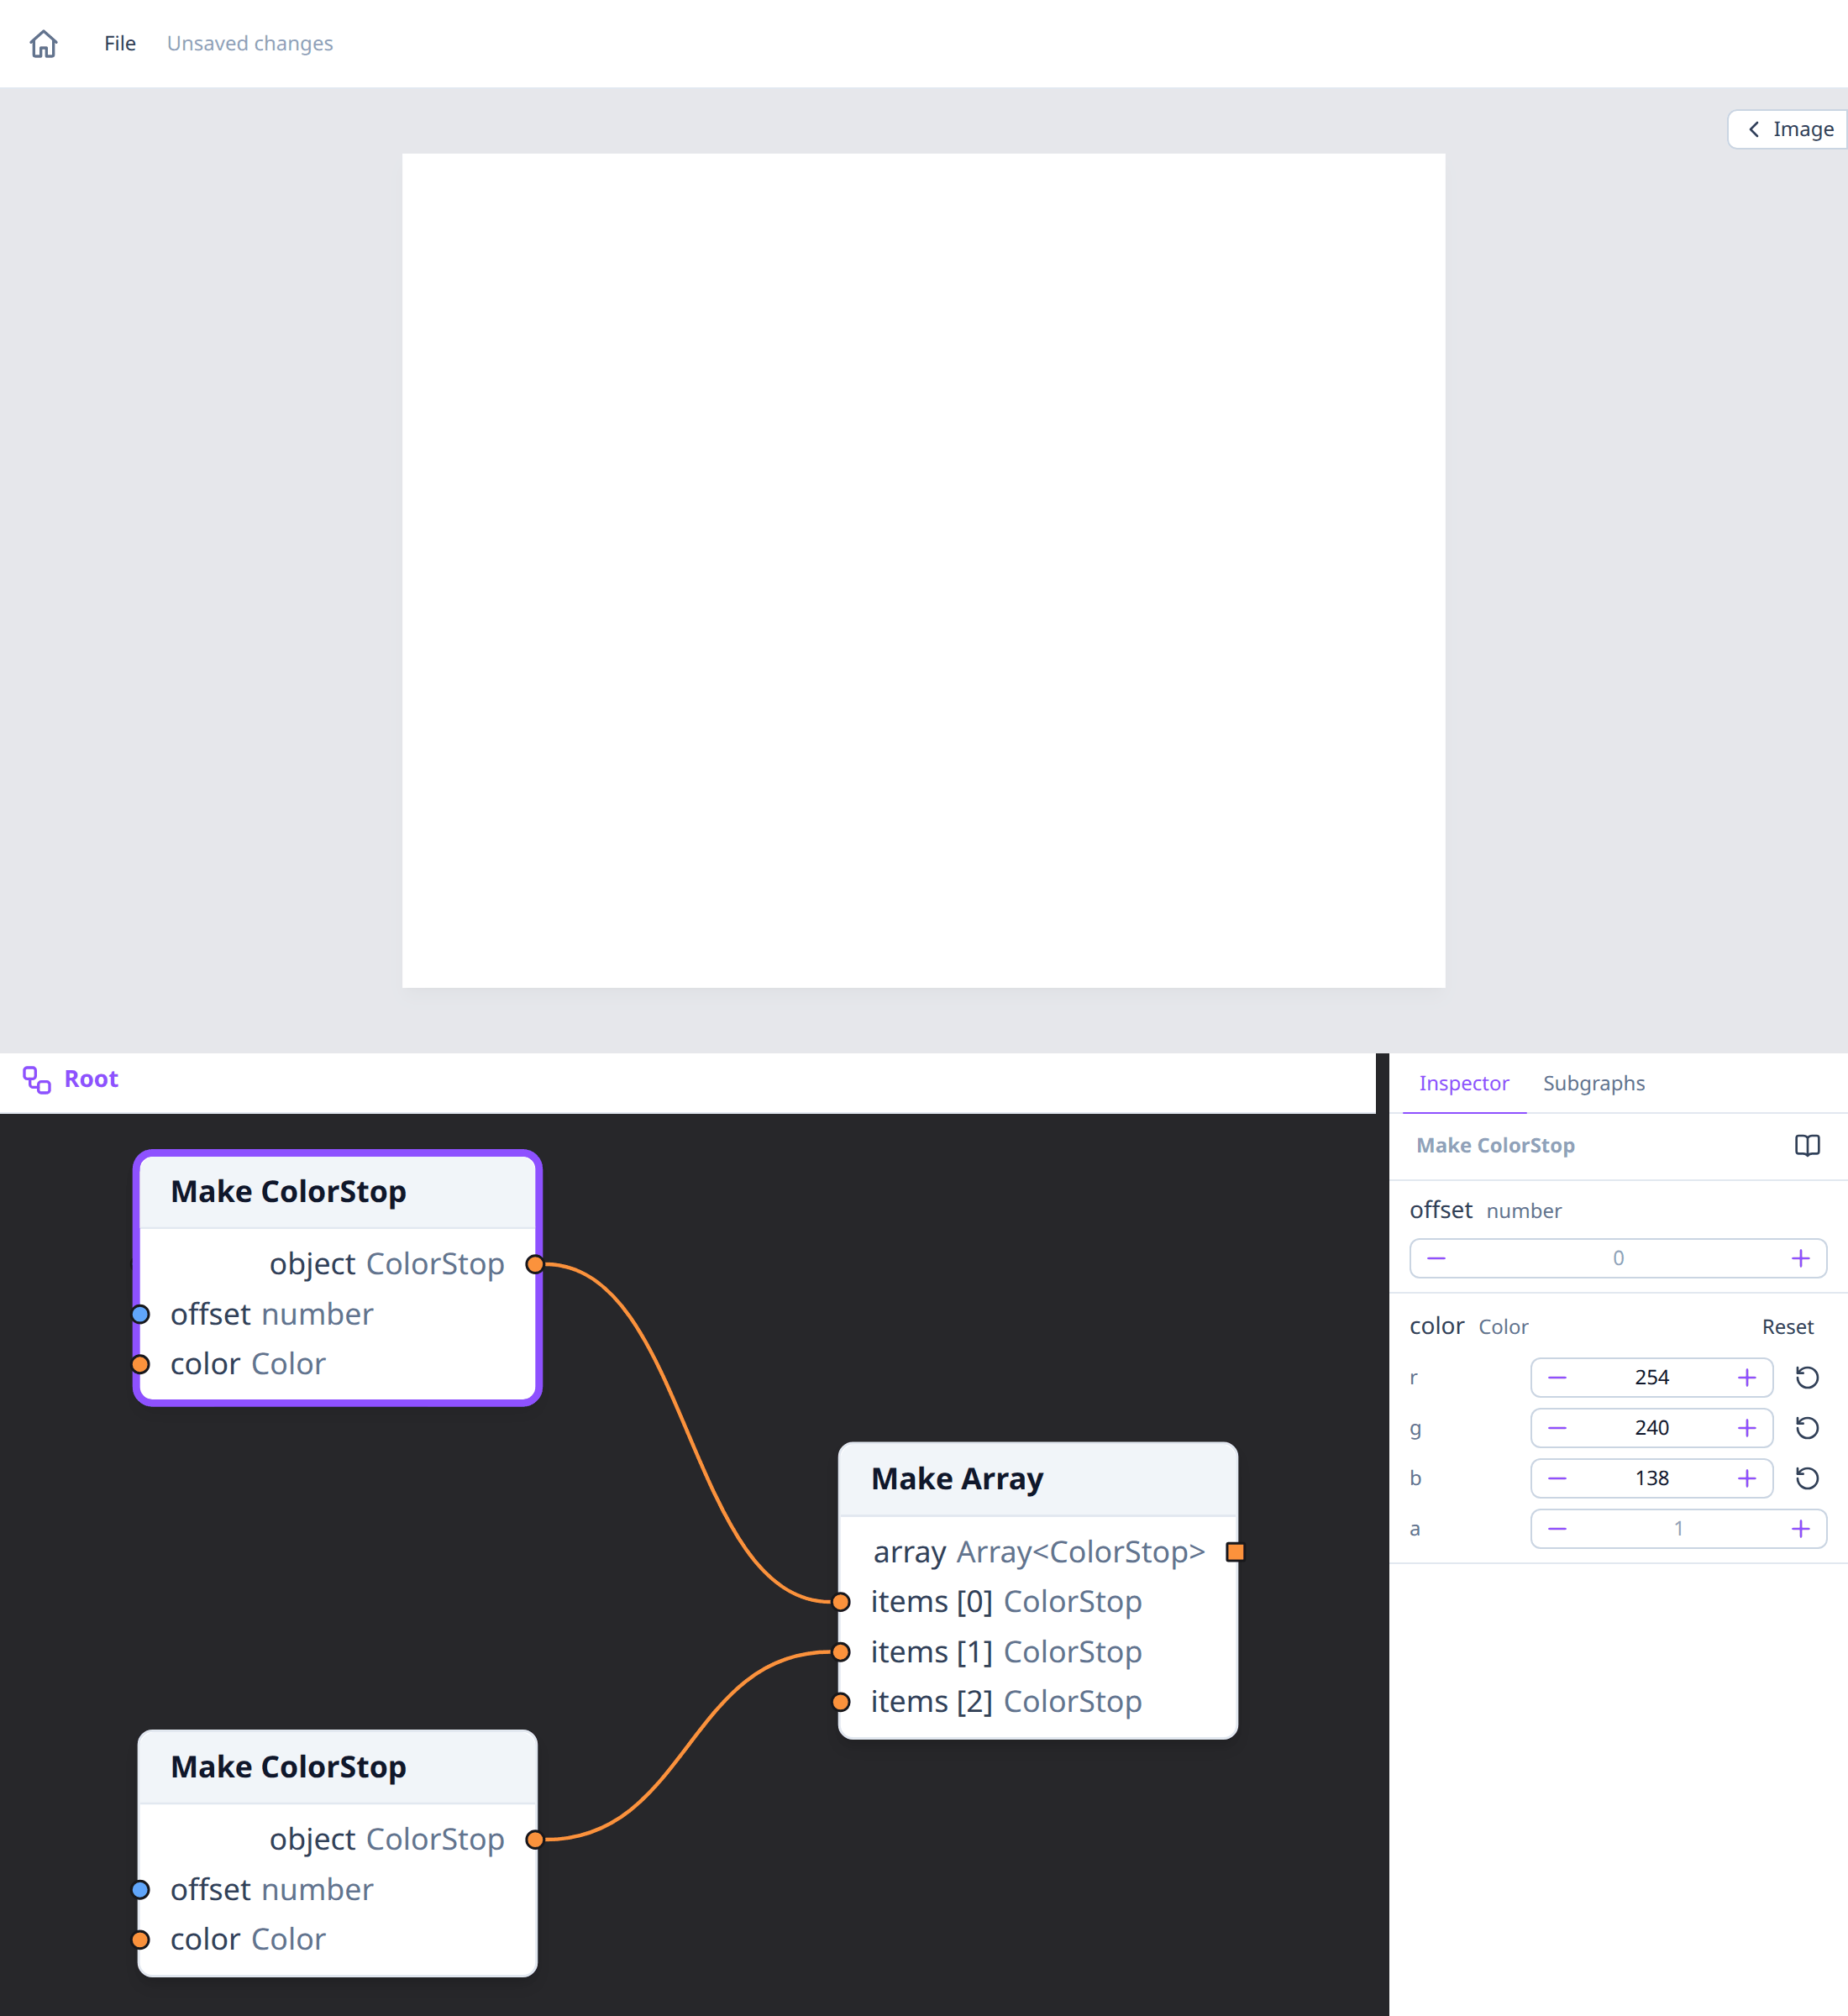
Nothing is drawn yet: stops are only colors waiting to be used.
2. Fill a ball with a radial gradient
Add a Make RadialGradient node (Objects → RadialGradient → Make
RadialGradient). Connect Make Array's array output to its stops, then
set:
innerCenter: x −50, y −50;outerRadius: 150.
A radial gradient goes from an inner circle (offset 0, here a point, since
innerRadius stays 0) to an outer circle (offset 1, radius 150 around
(0, 0)). Moving the inner circle away from the center puts the highlight
off to one side.
Now add a Make Circle, set its position to x 500, y 400, its radius
to 150 and its stroke's width to 0 (no outline). Connect the gradient's
object output to the circle's fill, and the circle to the Output node.
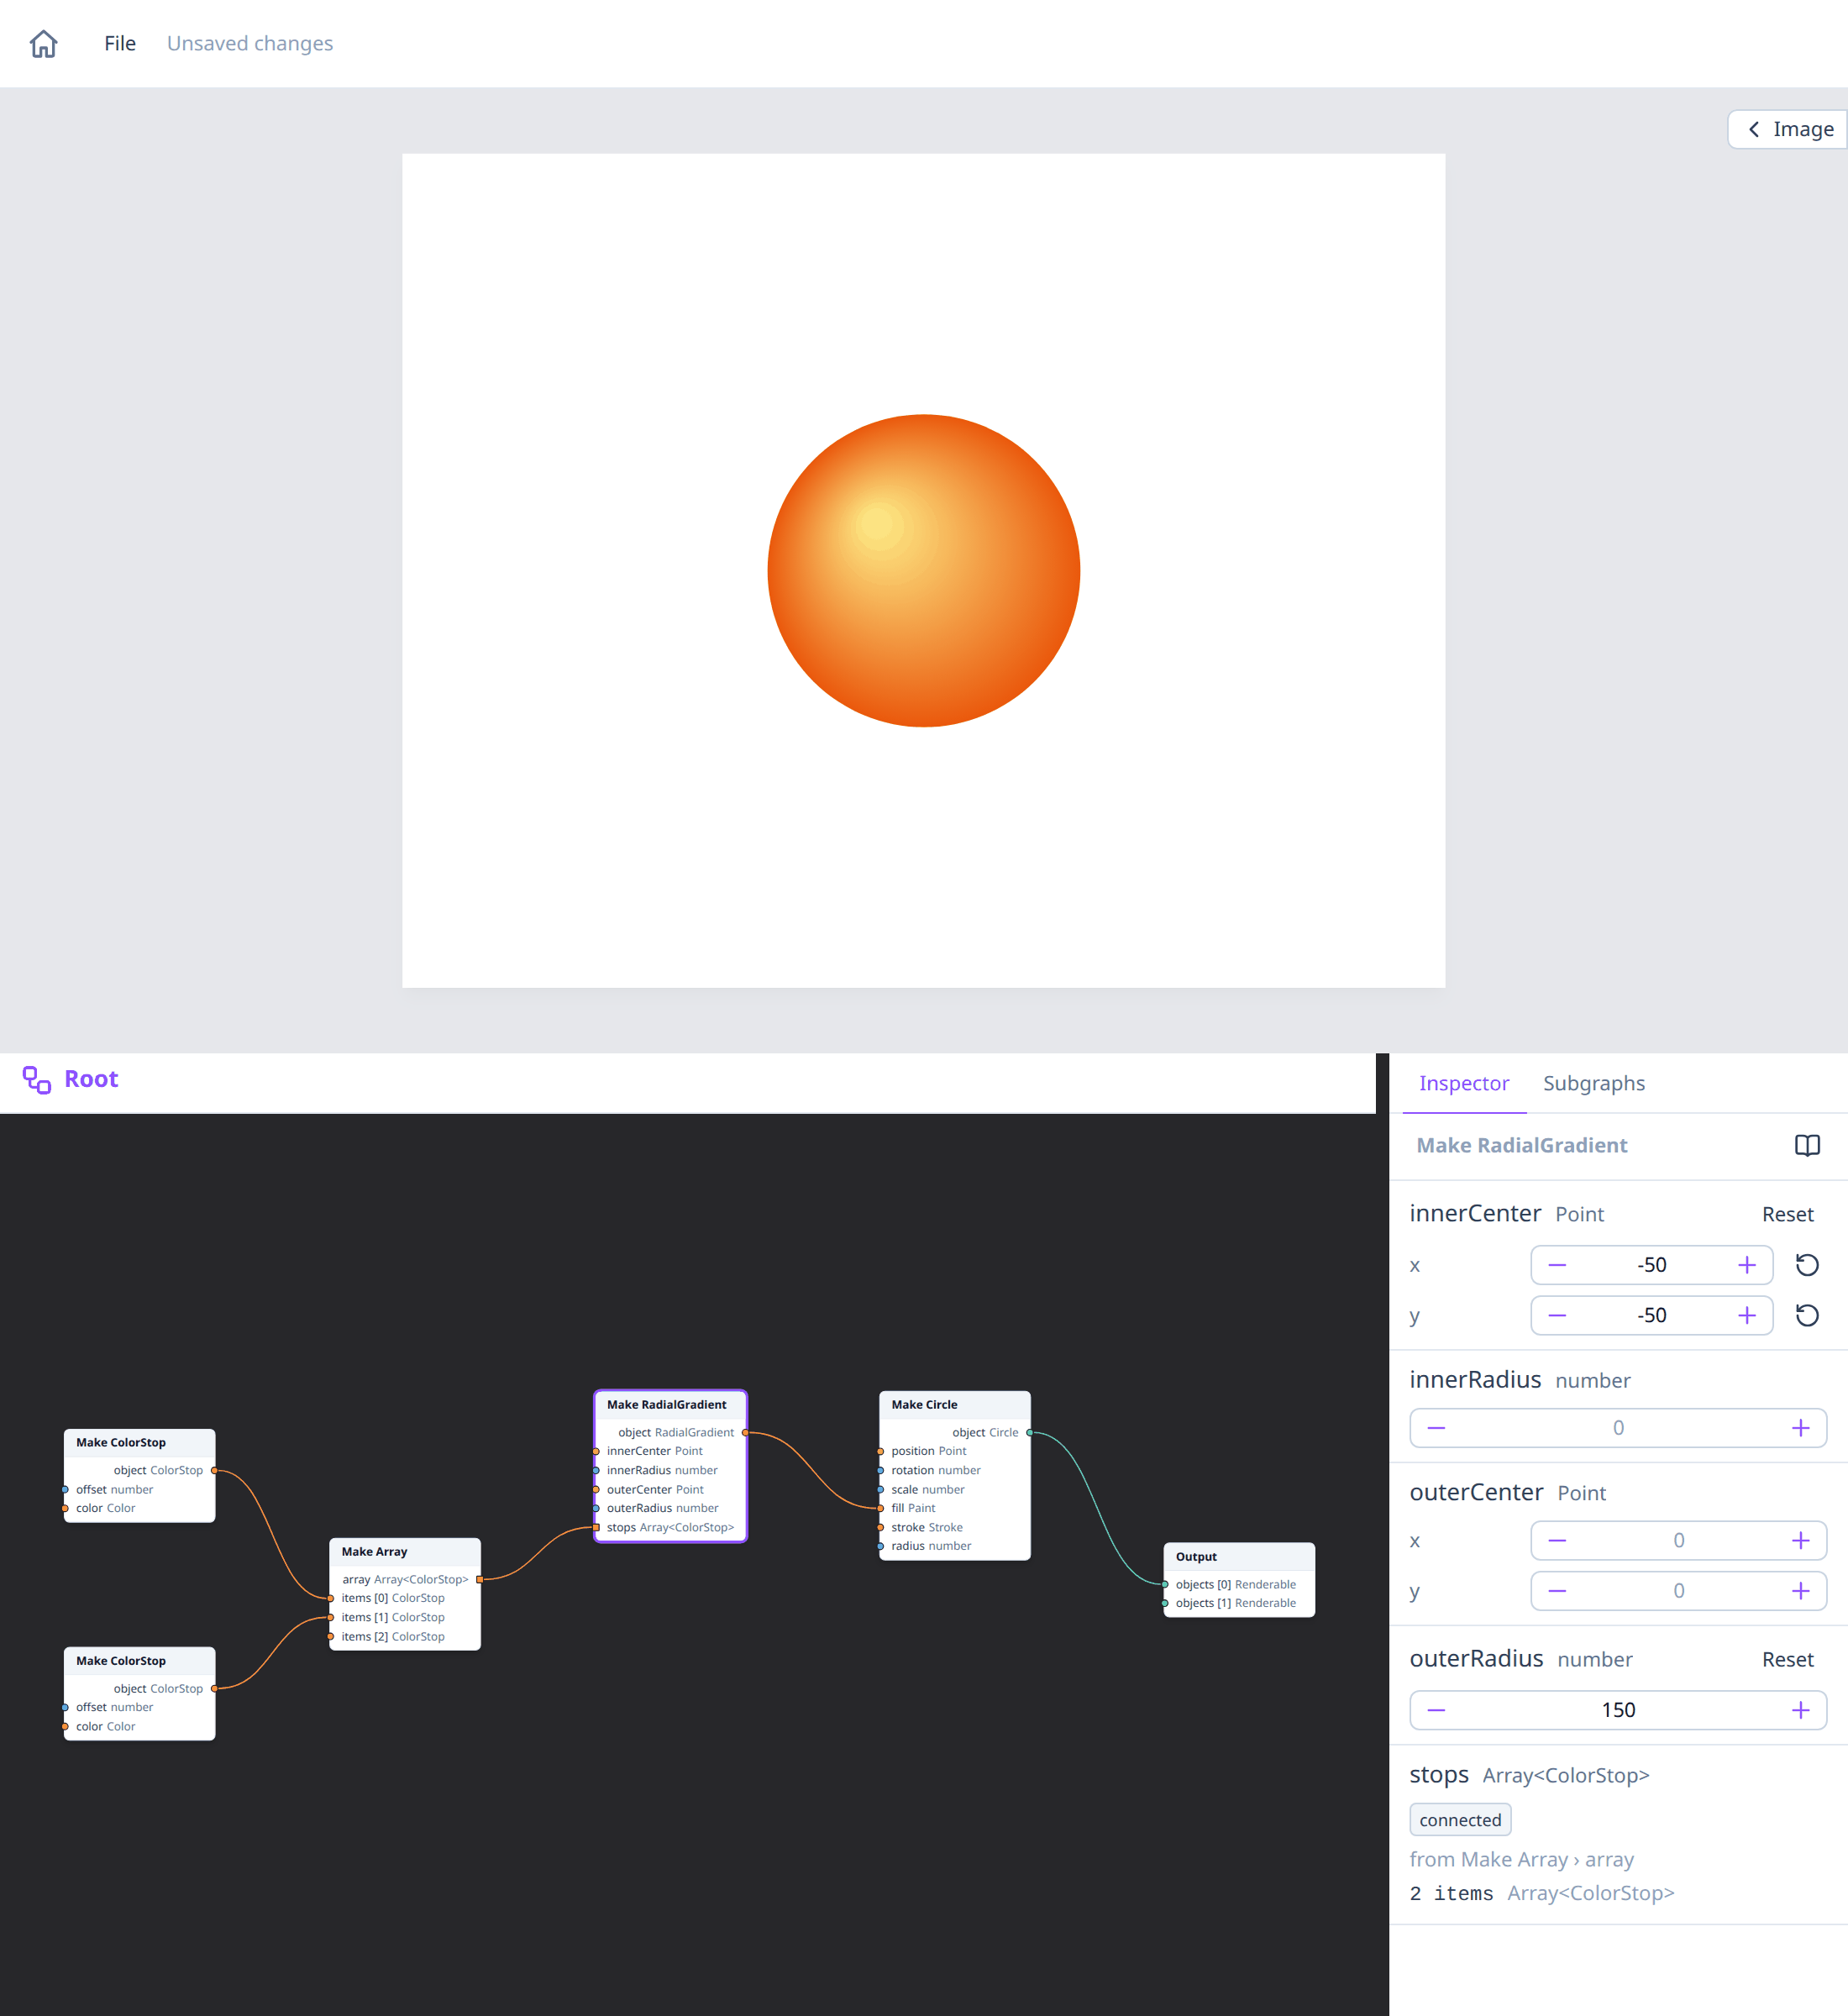
The gradient's points are in the circle's own units: (0, 0) is the circle's center, wherever the circle is on the page. Move the circle and the highlight moves with it.
3. Frame it with a gradient outline
Add a Make LinearGradient (Objects → LinearGradient → Make
LinearGradient) and connect the same Make Array array output to its
stops too: an output can feed any number of inputs. Set:
start: x −200, y −200;end: x 200, y 200.
Add a Make Stroke, set its width to 24 and connect the linear
gradient to its color.
Finally add a Make Rectangle with position x 500, y 400, width 400
and height 400, and set its fill's a to 0, so only the outline shows.
Connect the stroke to its stroke input, and the rectangle to the next
free slot of the Output node.
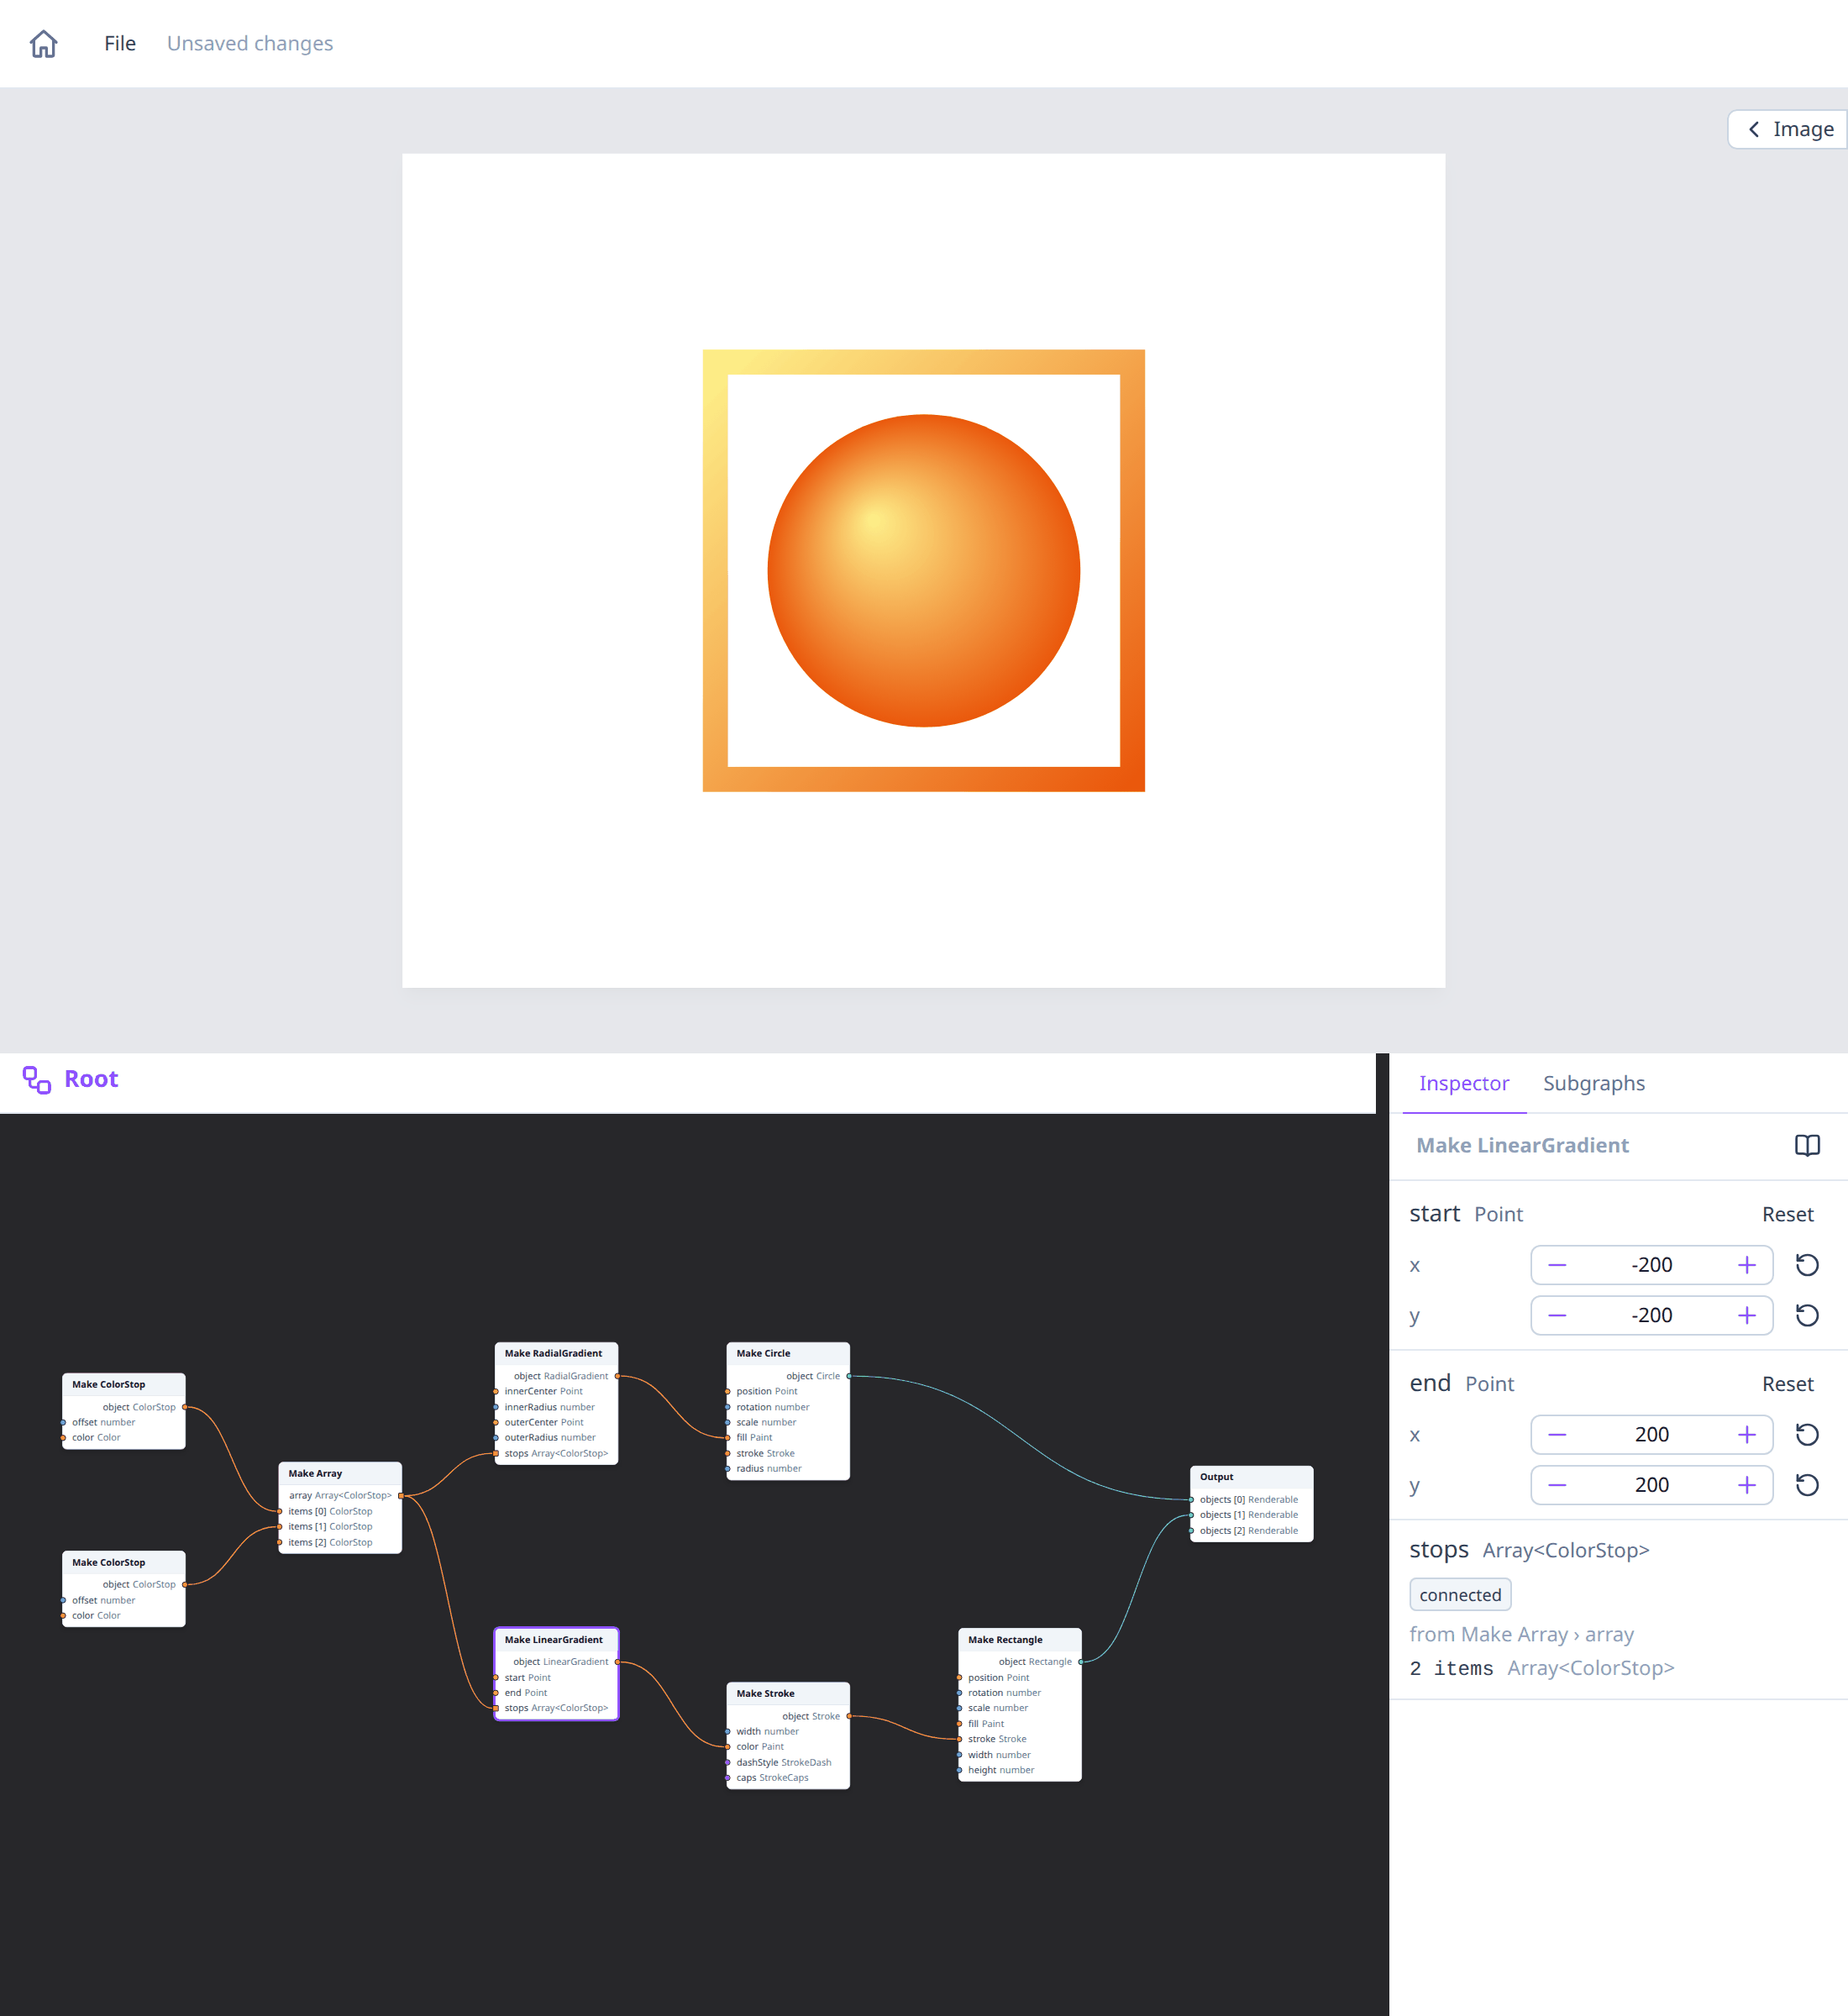
The rectangle is 400 wide around its position, so in its own units its corners are at ±200: the gradient runs exactly from its top-left corner to its bottom-right one. The result is the picture at the top.
How it works
fill and a stroke's color are Paints: a
Color, a
LinearGradient or a
RadialGradient. Typed in the inspector, they
are colors; a gradient has to come through a wire.
A gradient's points and radii are in the units of the shape it's used on, before its position, rotation and scale. So the same gradient fits any shape of the same size, wherever it is, and turns and scales with it. Before the first stop and after the last one, their colors continue: that's why the ball's edge and the frame's far corner are solid orange.
Sharing one Make Array between both gradients means changing a stop's color changes the ball and the frame together.
Nodes used
- Make ColorStop, on the ColorStop type's page.
- Make Array.
- Make RadialGradient and Make LinearGradient.
- Make Stroke, Make Circle and Make Rectangle.
- Output.
Variations
- Move the light. Change the radial gradient's
innerCenter: (50, 50) lights the ball from the bottom right, (0, 0) from the front. - Hard edges. Two stops at the same offset make a sharp edge instead of a blend. Add two more Make ColorStops at offset 0.5, the first pale yellow and the second orange, connected in that order: the ball gets a pale core with a sharp orange rim. Stops are sorted by offset, so the slots' order only matters between stops at the same offset.
- Blend two gradients. Duplicate Make RadialGradient (connect the stops
to the copy too) and set the copy's
innerCenterto (50, 50). Add a Lerp RadialGradient, connect the two gradients toaandband itsresultto the circle'sfill. Att0.5 the highlight is in the middle. Both gradients need as many stops to blend; otherwise the result isabelow 0.5 andbfrom 0.5 on. - A gradient background. Draw a page-sized rectangle as in Live preview, and give it a Make LinearGradient fill from (0, −400) to (0, 400) for a 1000 × 800 page: top to bottom, since (0, 0) is the rectangle's center.
- Gradient lines. Connect Make Stroke to the
strokeof a line, such as a Make Bezier, for a curve that changes color along the way.
See also
- Paint, LinearGradient, RadialGradient and ColorStop.
- Units and coordinates.
- Blending two circles, for Lerp nodes.